Creating a New Customer
Learn how to add a new customer to your LKG Billing database.
➕ Adding a Customer
Follow these steps to create a new customer record.
Step 1: Navigate to Customers
From the dashboard or main menu, click on Customers.
Step 2: Click "Add Customer"
Look for the "Add" or "New Customer" button (usually with a ➕ icon).
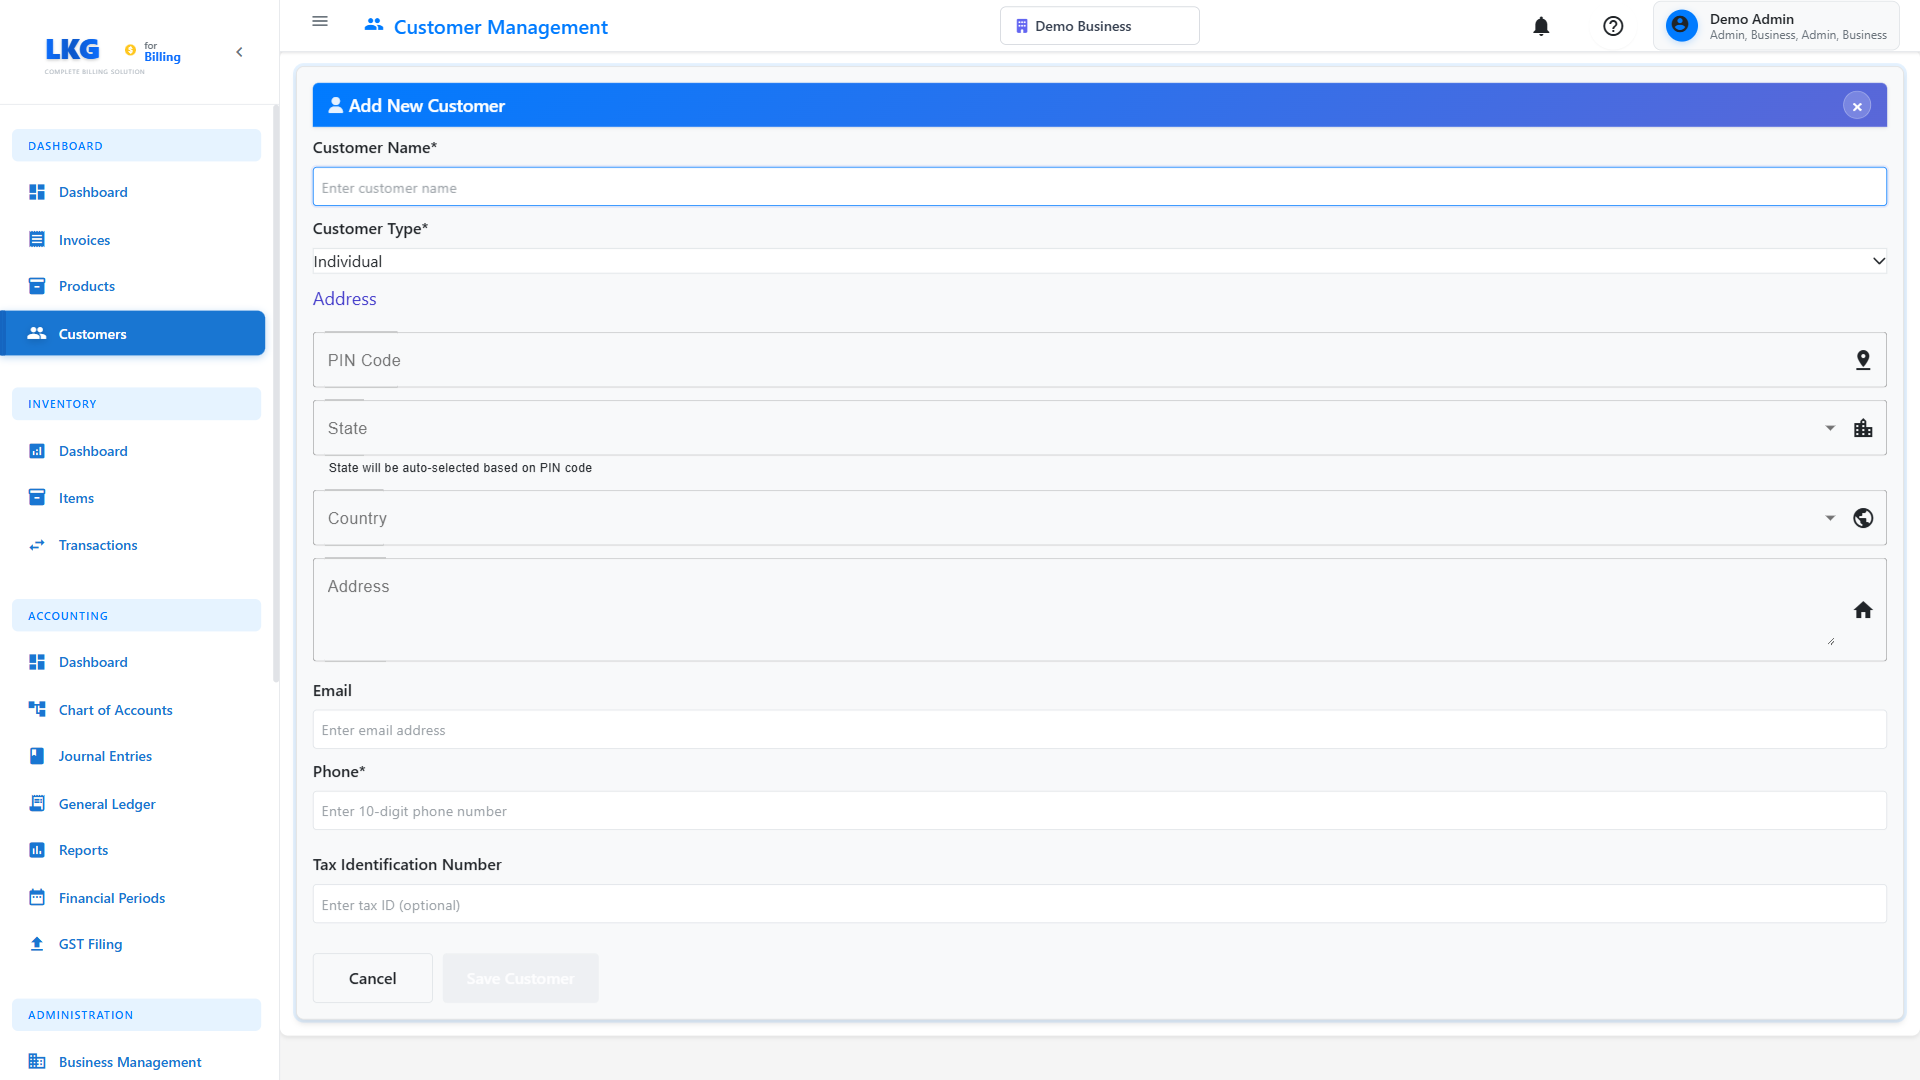
Step 3: Fill in Customer Information
Complete the customer creation form with the following details:
📝 Required Fields
Customer Name
The full name of the customer or business.
Examples:
John DoeAcme CorporationMumbai Retailers Pvt Ltd
Use the legal business name for companies, or full personal name for individuals.
Email Address
Customer's primary email address for invoices and communication.
Examples:
john.doe@example.comaccounts@acmecorp.cominfo@mumbairetailers.in
The system validates email format. Invoices will be sent to this address.
📞 Optional Fields
Phone Number
Contact phone number with country code.
Format Examples:
+91-98765-43210(India)+1-555-123-4567(USA)+44-20-1234-5678(UK)
Address
Complete mailing/billing address.
Example:
123 Main Street, Downtown
Near City Mall, 2nd Floor
City
City name.
Examples:
MumbaiNew DelhiBangalore
State/Province
State or province name.
Examples:
MaharashtraDelhiKarnataka
Pincode/Postal Code
ZIP or postal code.
Examples:
400001(India)110001(India)10001(USA)
Country
Country name or code.
Examples:
IndiaUnited StatesUnited Kingdom
🏢 Business-Specific Fields
Company Name
If the customer is a business, enter the official company name.
Example: Acme Corporation Private Limited
Tax ID / GST Number
Tax identification number (GST in India, VAT in Europe, etc.).
Examples:
29ABCDE1234F1Z5(India GST)GB123456789(UK VAT)
Customer Type
Select the type:
- Individual - Personal customer
- Business - Company or organization
💼 Sample Customer Data
Here's a complete example for practice:
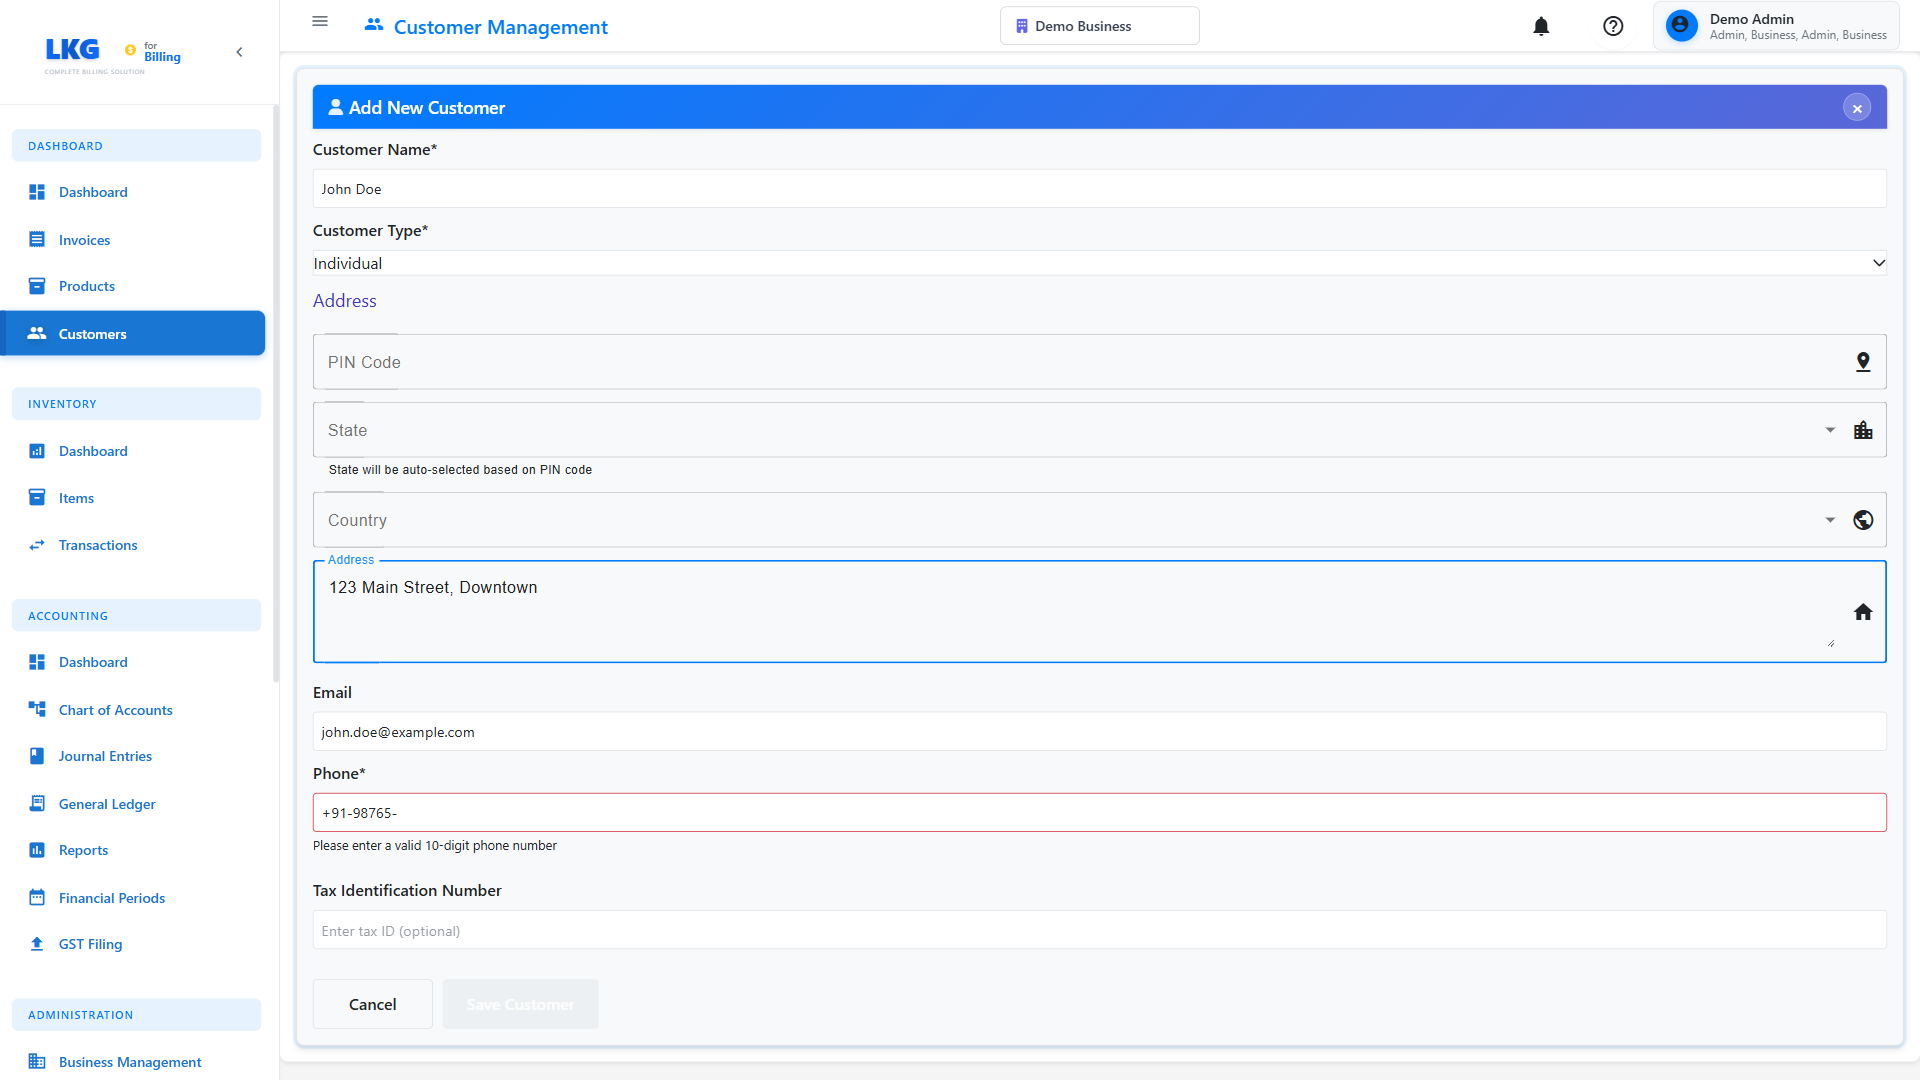
Sample Customer:
Name: John Doe
Email: john.doe@example.com
Phone: +91-98765-43210
Address: 123 Main Street, Downtown
City: Mumbai
State: Maharashtra
Pincode: 400001
Country: India
Customer Type: Individual
Sample Business Customer:
Name: Acme Corporation
Company: Acme Corporation Private Limited
Email: accounts@acmecorp.com
Phone: +91-22-1234-5678
Address: Tech Park, Building A, Floor 5
City: Mumbai
State: Maharashtra
Pincode: 400076
Country: India
Tax ID: 29ABCDE1234F1Z5
Customer Type: Business
✅ Step 4: Save the Customer
Once all information is entered:
- Review the details for accuracy
- Click the "Save" or "Create Customer" button
- Wait for the confirmation message
- The new customer will appear in your customer list
Look for a green confirmation message like "Customer created successfully!"
❌ Common Validation Errors
Invalid Email Format
Error: "Please enter a valid email address"
Solution: Ensure email has @ symbol and domain (e.g., user@domain.com)
Duplicate Email
Error: "Customer with this email already exists"
Solution: Use a different email or edit the existing customer
Missing Required Fields
Error: "Please fill in all required fields"
Solution: Name and Email are required - ensure both are filled
Invalid Phone Format
Warning: Phone number format may not be valid
Solution: Include country code: +91-1234567890
🎯 After Creating a Customer
Once created, you can:
- Create an Invoice - Generate an invoice for this customer
- Edit Details - Update customer information
- View History - See all transactions with this customer
- Add Notes - Record important customer information
💡 Best Practices
- Be Accurate - Double-check email addresses to ensure invoices reach customers
- Complete Profiles - More information helps with reports and tax compliance
- Use Consistent Formatting - Keep phone numbers and addresses in consistent format
- Add Notes - Use the notes field to remember customer preferences
- Verify Tax IDs - Ensure GST/VAT numbers are correct for B2B transactions
🔄 Quick Actions
After creating a customer, you might want to:
- Create an Invoice - Generate their first invoice
- Add a Product - Add items to invoice
- Record a Payment - Track money received
Customer created? Learn how to create products next! 👉