Stock Adjustments
Stock adjustments allow you to correct inventory quantities when physical counts don't match system records. This is essential for maintaining accurate inventory data.
When to Make Adjustments
Common scenarios requiring stock adjustments:
- Physical Count Discrepancies - Actual stock differs from system records
- Damaged Goods - Products that can no longer be sold
- Theft or Loss - Missing inventory items
- Found Items - Discovered stock not in the system
- Expired Products - Perishable items past their sell-by date
- Quality Issues - Products rejected due to defects
- Initial Stock Entry - Setting opening balances when starting to use the system
Stock adjustments can only be performed by Admin users to maintain inventory integrity and audit trails.
Making a Stock Adjustment
Step 1: Navigate to Inventory
- Click Inventory in the sidebar
- Select Inventory Items from the submenu
- Find the product you need to adjust
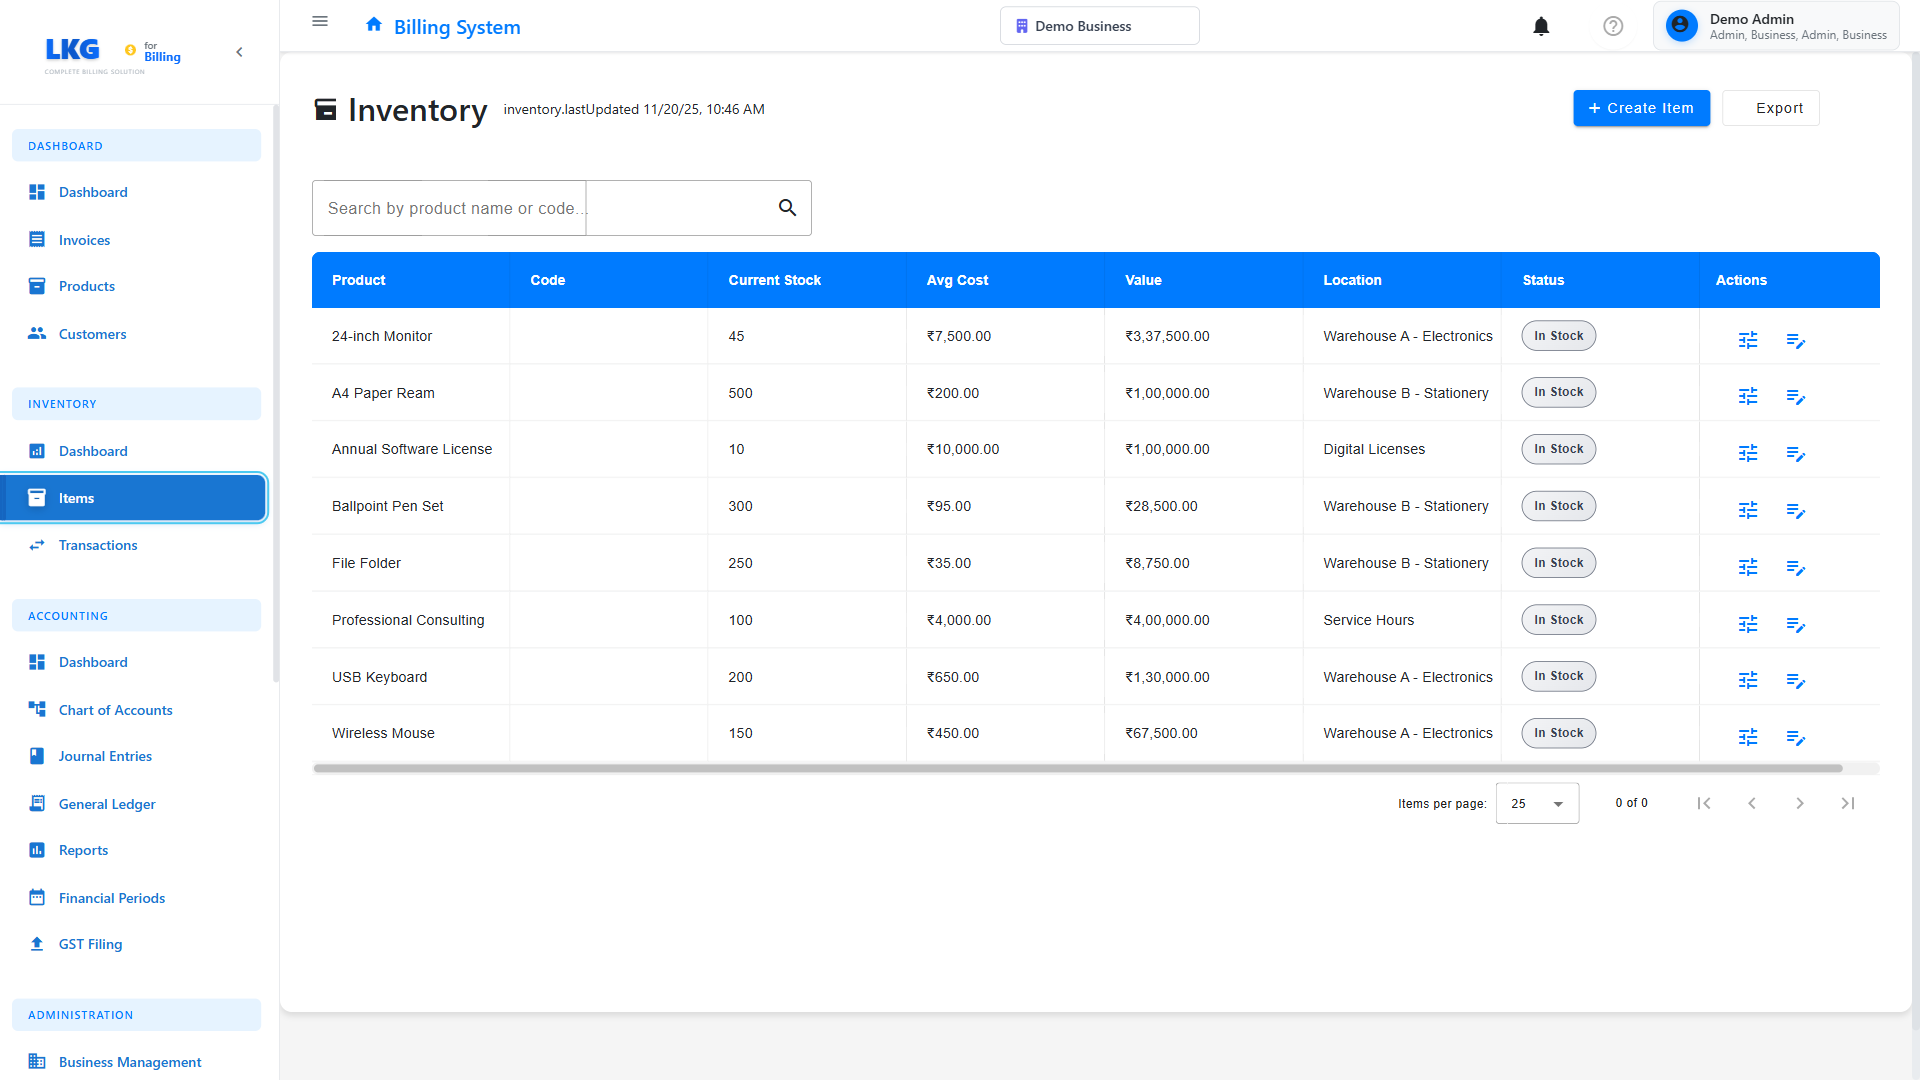
Step 2: Initiate Adjustment
- Click the Actions button (three dots) for the item
- Select Adjust Stock from the menu
- The adjustment dialog will open
Step 3: Enter Adjustment Details
Fill in the following information:
Adjustment Type
Choose the appropriate adjustment type:
- Stock In - Increase inventory (found items, corrections)
- Stock Out - Decrease inventory (damage, loss, corrections)
Quantity
- Enter the number of units to adjust
- Use positive numbers only
- The system will automatically add or subtract based on the adjustment type
Reason
Select from predefined reasons or enter a custom reason:
Common Reasons for Stock In:
- Physical count - found extra units
- Opening balance
- Supplier correction
- Return from damaged stock
Common Reasons for Stock Out:
- Physical count - shortage
- Damaged goods
- Theft or loss
- Expired products
- Quality issues
- Sample products
Notes (Optional)
- Add detailed notes about the adjustment
- Include reference numbers if applicable
- Document who performed the physical count
- Note any corrective actions taken
Step 4: Review and Confirm
- Review the adjustment summary:
- Current stock level
- Adjustment amount
- New stock level after adjustment
- Click Confirm to process the adjustment
- Click Cancel to discard changes
Adjustment Examples
Example 1: Physical Count Shortage
Scenario: Physical count shows 45 units, but system shows 50 units.
Steps:
- Select Stock Out adjustment type
- Enter quantity: 5
- Select reason: Physical count - shortage
- Add notes: "Annual inventory count - 5 units missing"
- Confirm adjustment
Result: Stock reduced from 50 to 45 units
Example 2: Damaged Goods
Scenario: 3 units damaged during storage.
Steps:
- Select Stock Out adjustment type
- Enter quantity: 3
- Select reason: Damaged goods
- Add notes: "Water damage in storage room - units disposed"
- Confirm adjustment
Result: Stock reduced by 3 units, transaction recorded
Example 3: Opening Balance
Scenario: Setting initial stock when starting to use the system.
Steps:
- Select Stock In adjustment type
- Enter quantity: 100 (current physical count)
- Select reason: Opening balance
- Add notes: "Initial stock entry as of Nov 20, 2025"
- Confirm adjustment
Result: Stock set to 100 units from 0
Example 4: Found Items
Scenario: Found 10 units in warehouse that weren't in the system.
Steps:
- Select Stock In adjustment type
- Enter quantity: 10
- Select reason: Physical count - found extra units
- Add notes: "Found in secondary storage area during reorganization"
- Confirm adjustment
Result: Stock increased by 10 units
Viewing Adjustment History
All stock adjustments are automatically recorded in the transaction history.
Accessing Transaction History
- Go to Inventory → Transactions
- Filter by transaction type: Adjustment
- View all adjustment records with details
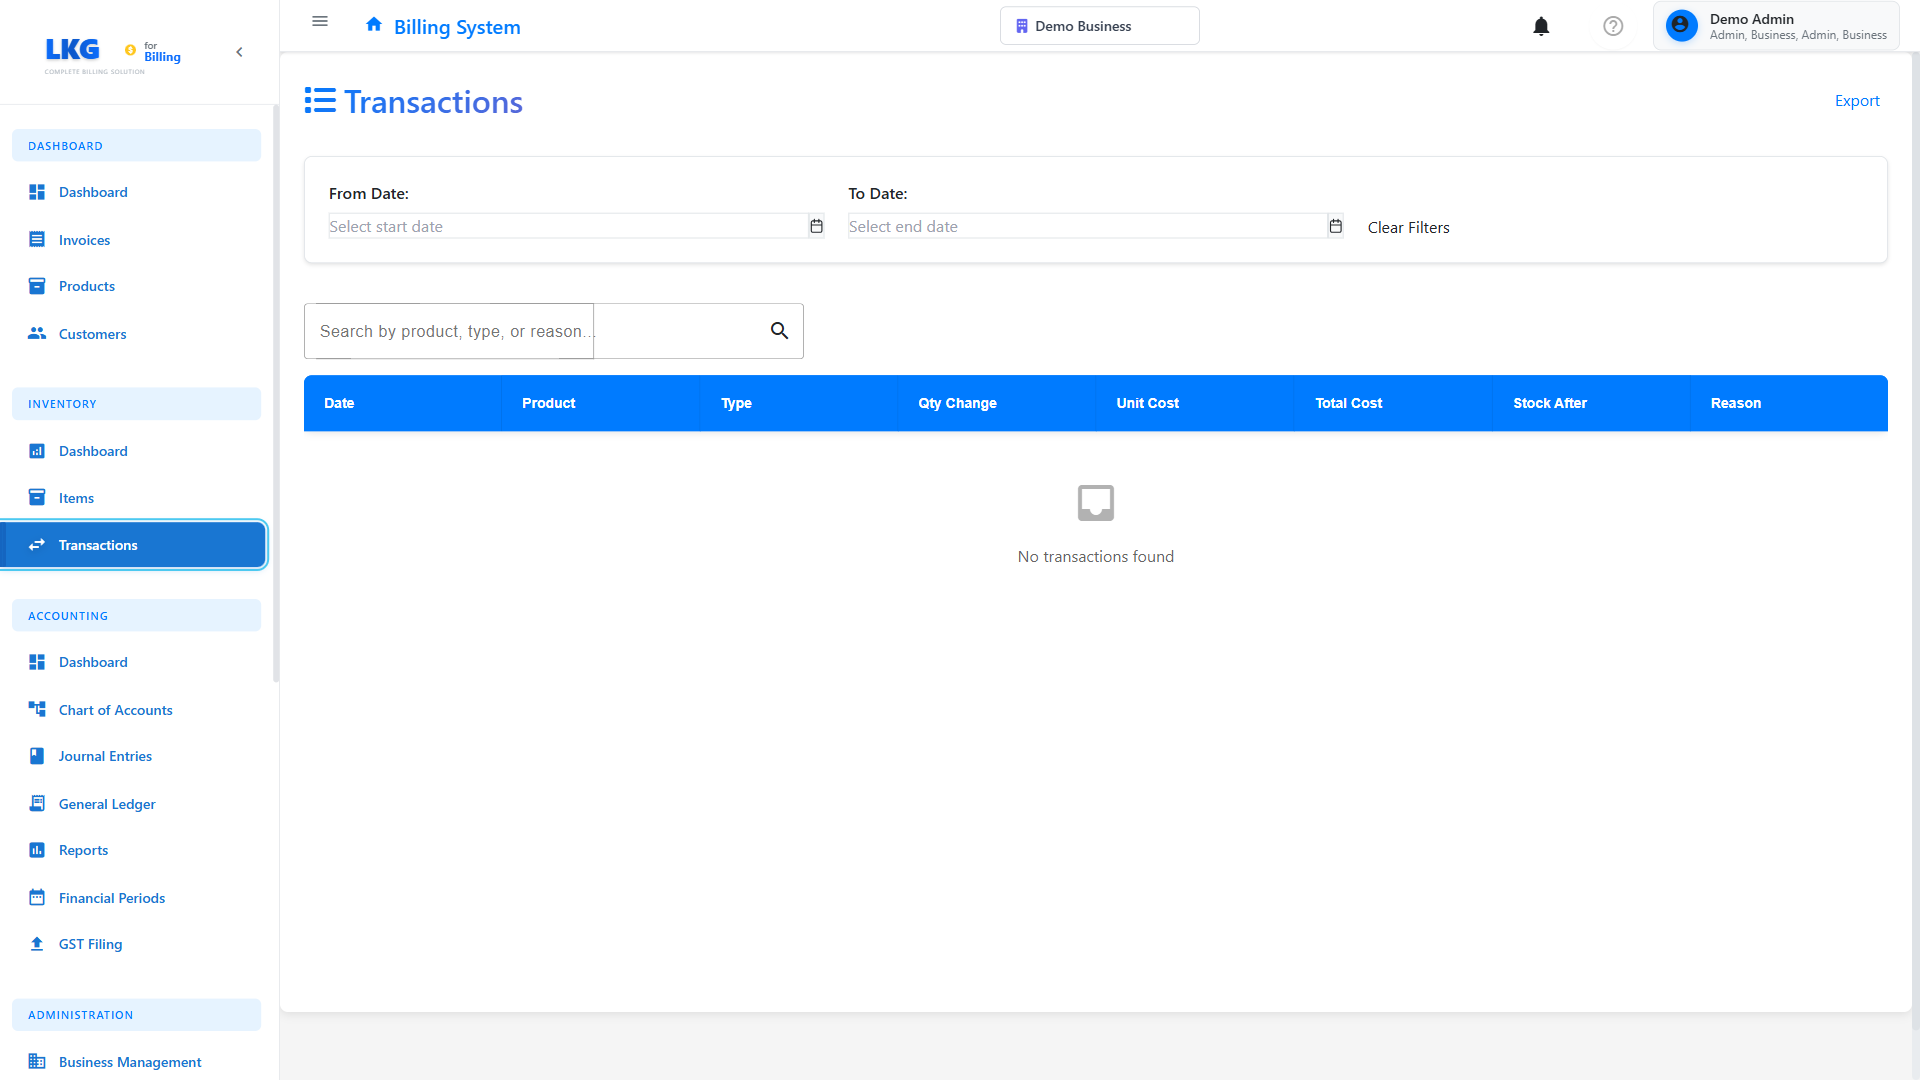
Transaction Details
Each adjustment record includes:
- Date and Time - When the adjustment was made
- Product Name - Which item was adjusted
- Type - Stock In or Stock Out
- Quantity - Amount adjusted
- Reason - Why the adjustment was made
- Notes - Additional details
- User - Who made the adjustment
- Reference - System-generated reference number
Best Practices
Regular Physical Counts
- Schedule periodic physical inventory counts
- Compare physical counts with system records
- Make adjustments promptly when discrepancies are found
- Document the count date and person responsible
Proper Documentation
- Always provide detailed notes for adjustments
- Include reference numbers when applicable
- Document authorization for large adjustments
- Keep supporting documentation (photos, reports)
Adjustment Approval Process
For organizations with multiple users:
-
Small Adjustments (< 5% of stock)
- Can be done by inventory managers
- Require reason and notes
-
Large Adjustments (≥ 5% of stock)
- Require supervisor approval
- Document with supporting evidence
- Investigate root cause
-
High-Value Items
- Always require manager approval
- Document thoroughly
- Consider implementing additional controls
Investigate Discrepancies
When making adjustments, investigate why discrepancies occurred:
- Theft Prevention - Identify security gaps
- Process Improvements - Fix counting or receiving procedures
- Training Needs - Address user errors
- System Issues - Report bugs or feature requests
Audit Trail
- Review adjustment history monthly
- Look for patterns or suspicious activity
- Verify large adjustments have proper documentation
- Use reports for accountability
Common Scenarios
Cycle Counting
Implement ongoing cycle counts instead of annual physical inventories:
- Divide inventory into groups (A, B, C based on value)
- Count high-value items (A) monthly
- Count medium-value items (B) quarterly
- Count low-value items (C) annually
- Make adjustments as needed after each count
Seasonal Adjustments
For seasonal businesses:
- Conduct full count before peak season
- Adjust stock levels to match physical inventory
- Monitor closely during high-volume periods
- Verify counts after season ends
Product Recalls
When products are recalled:
- Identify affected units in inventory
- Create Stock Out adjustment
- Use reason: Quality issues or Product recall
- Note recall details and batch numbers
- Document disposal or return to supplier
Troubleshooting
Cannot Make Adjustments
Problem: Adjustment option is not available.
Solutions:
- Verify you are logged in as an Admin user
- Check that inventory tracking is enabled for the product
- Ensure the product is not archived or deleted
Adjustment Not Showing in Stock Level
Problem: Made an adjustment but stock didn't change.
Solutions:
- Refresh the page
- Check transaction history to verify adjustment was recorded
- Verify correct adjustment type was selected (In vs Out)
- Contact support if issue persists
Negative Stock After Adjustment
Problem: Adjustment would result in negative stock.
Solutions:
- Review the intended adjustment
- If stock is actually zero, adjust to zero instead
- Investigate why stock would go negative
- Check for unreported sales or usage
Reports and Analytics
Adjustment Reports
Generate reports to analyze adjustment patterns:
- By Product - Which items require frequent adjustments
- By Reason - Most common adjustment reasons
- By User - Who makes the most adjustments
- By Time Period - Seasonal or monthly trends
Using Reports
- Go to Reports → Inventory Reports
- Select Stock Adjustments Report
- Choose date range and filters
- Export or print for analysis
Next Steps
- View Transaction History - See all inventory movements
- Manage Inventory Items - Update product settings
- Inventory Overview - Monitor overall inventory health
Important: All stock adjustments are permanent and create an audit trail. Always double-check quantities and reasons before confirming adjustments.